Configure the network for static addresses
Analytics — capacity explorer
Analytics — capacity trends
Analytics — integrated analytics
Analytics — IOPS hot spots
Analytics —Throughput hot spots
Analytics activity by path
Analytics activity by client
Continuous replication
Configure the network for static addresses
Create a Qumulo cluster on a Mac
Create a Qumulo cluster on Windows
Create a quota
Create an NFS export
Create an SMB share
Creating snapshots using the Qumulo dashboard
Safe shutdown
Scripting Qumulo with S3 via Minio
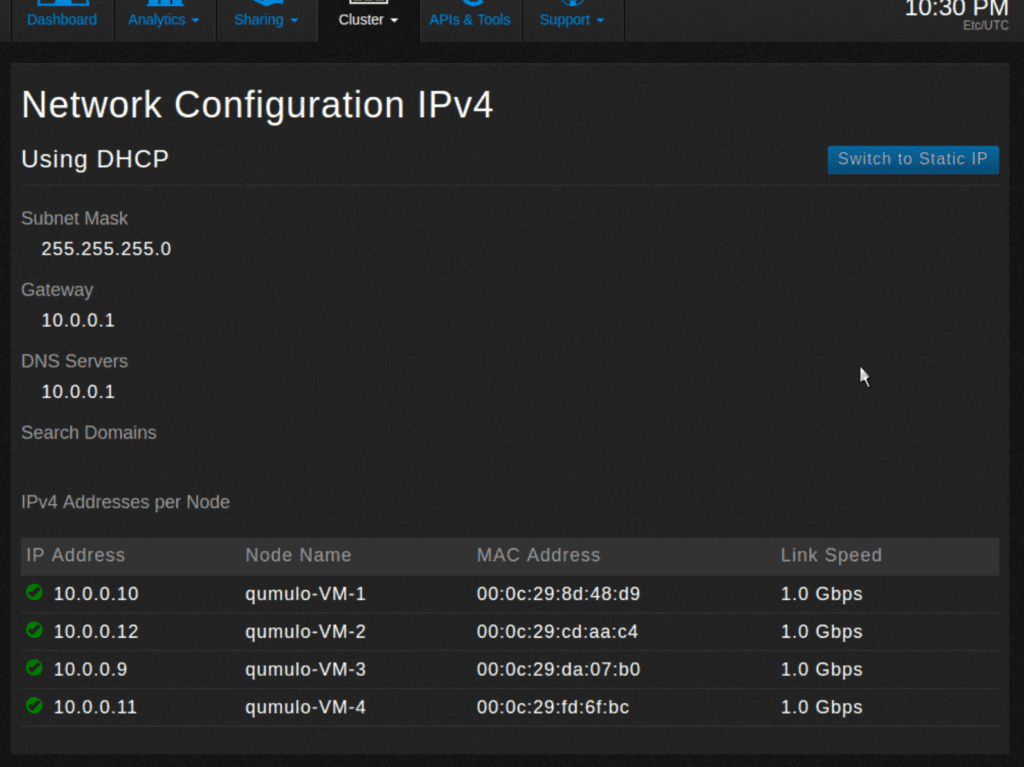
In this tutorial you use Network Configuration to manually assign IPv4 static addresses.
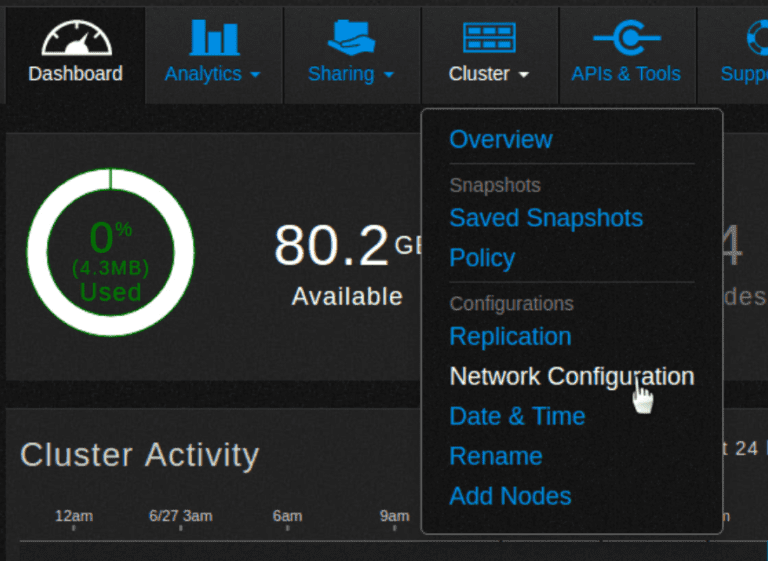
1. From the dashboard, point to Cluster and click Network Configuration.
2. The Network Configuration screen appears. In this example, the cluster is currently configured to use DHCP.
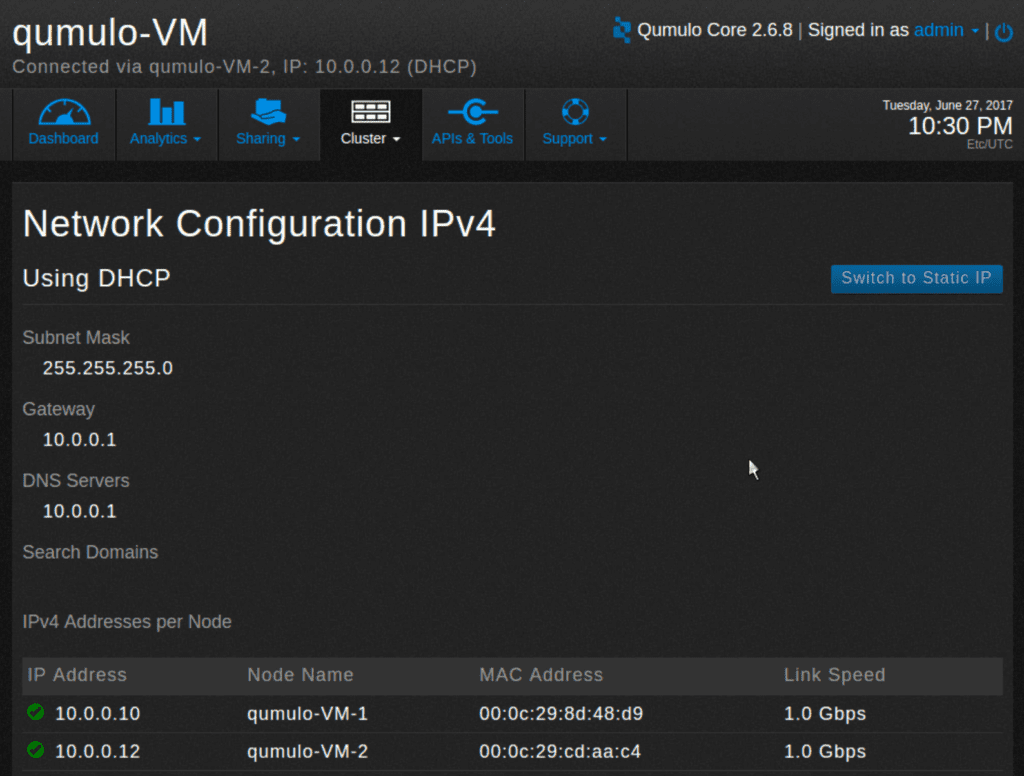
3. Click Switch to Static IP to manually assign IPv4 static addresses.
4. The Network Configuration IPv4 screen appears.
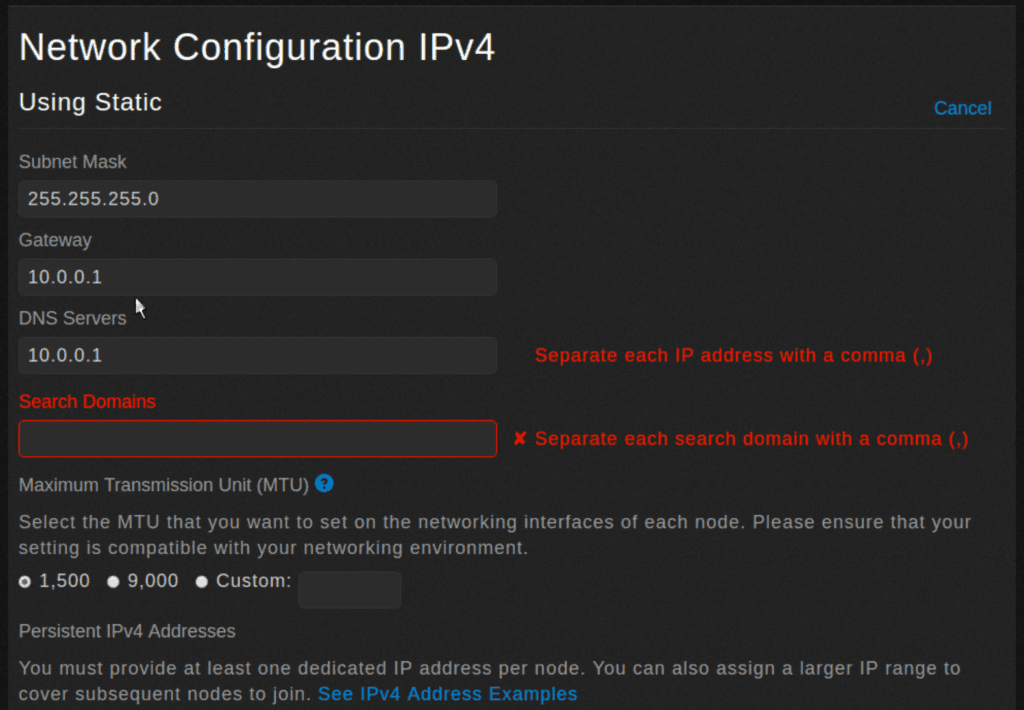
5. Fill in each of the fields as appropriate and change the MTU size, if necessary.
6. Scroll down and set the static IP addresses. Use either a comma-separated list or a range, using a dash.
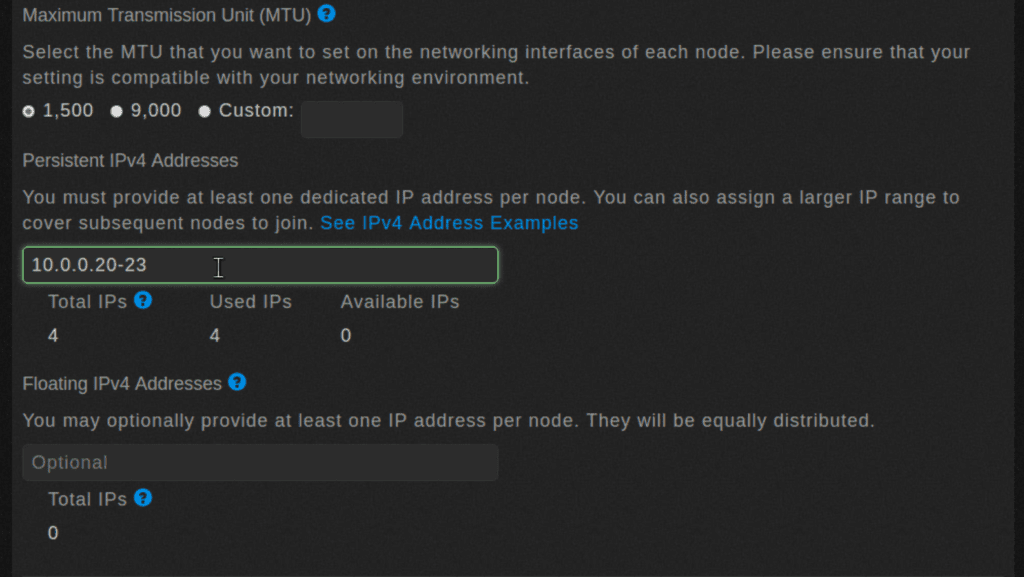
7. Optionally, you can assign floating IP addresses that will automatically be reassigned to the remaining nodes if a node fails.
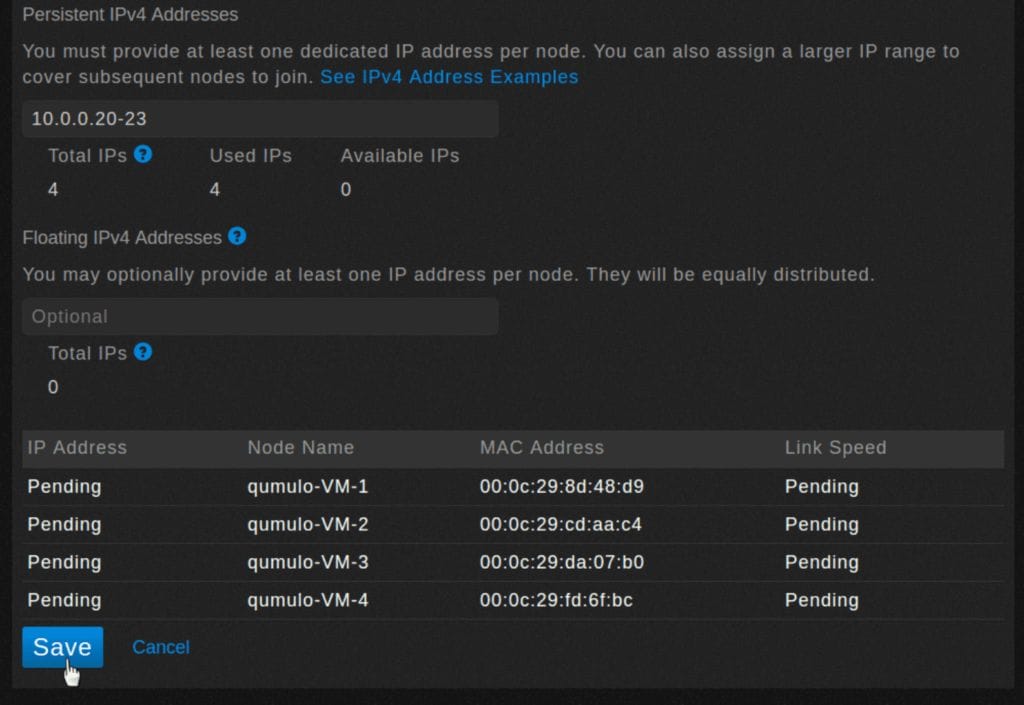
8. Click Save.
9. A dialog box appears

10. The Network Configuration IPv4 screen shows that you are now using static networking.
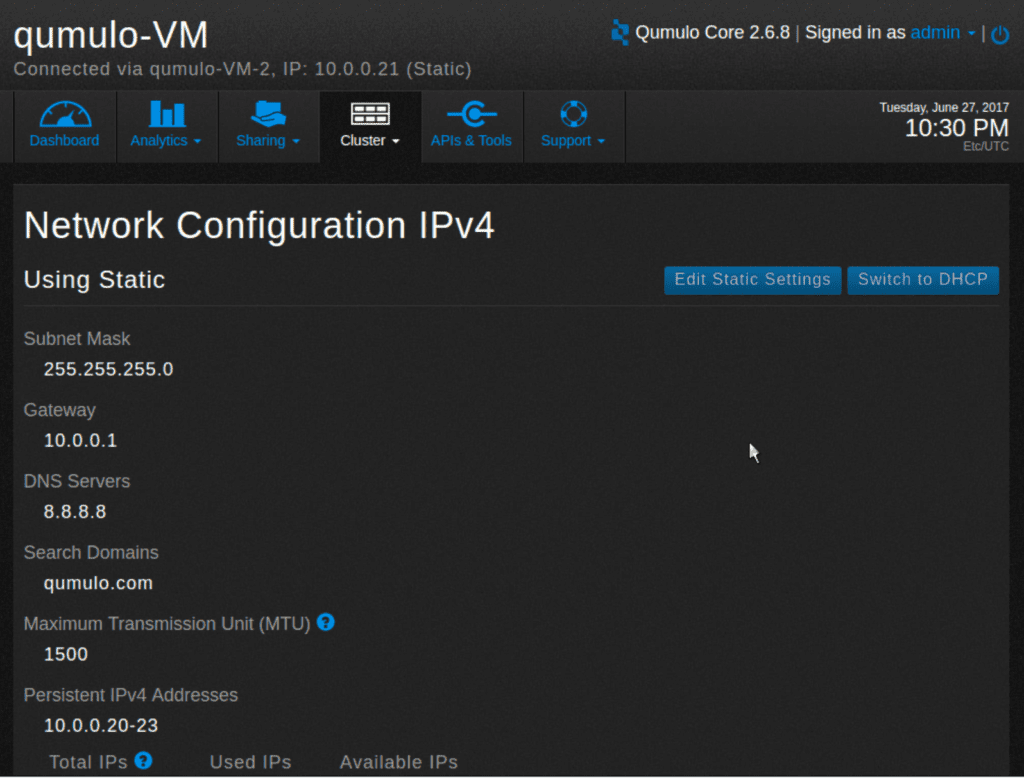
11. To change static settings, click Edit Static Settings.
12. To revert to DHCP, click Switch to DHCP.
13. The screen changes to show a pending state.
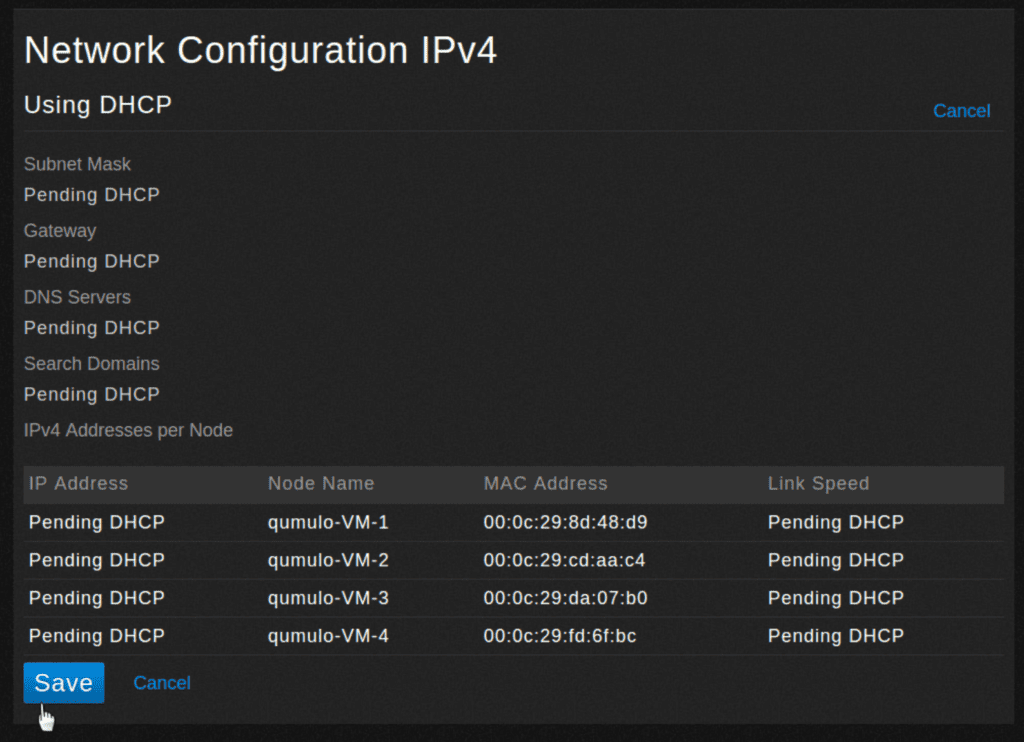
14. Click Save.
15. A dialog box appears.

16. The screen changes to show you are now using DHCP.
