


Azure Native Qumulo Now available in the EU, UK, and Canada – Learn More
Analytics — capacity explorer
Analytics — capacity trends
Analytics — integrated analytics
Analytics — IOPS hot spots
Analytics —Throughput hot spots
Analytics activity by path
Analytics activity by path
Continuous replication
Configure the network for static addresses
Create a Qumulo cluster on a Mac
Create a Qumulo cluster on Windows
Create a quota
Create an NFS export
Create an SMB share
Creating snapshots using the Qumulo dashboard
Safe shutdown
Scripting Qumulo with S3 via Minio
(This procedure assumes that you have already gotten the AMI. If you haven’t, go here.)
In this procedure, you set up a single node QF2 cluster on AWS. The procedure assumes that you already have an AWS account and understand basic AWS operations such as getting AWS keys, selecting an AMI, selecting an EC2 instance and setting up security groups.
We recommend you use Chrome as your browser.
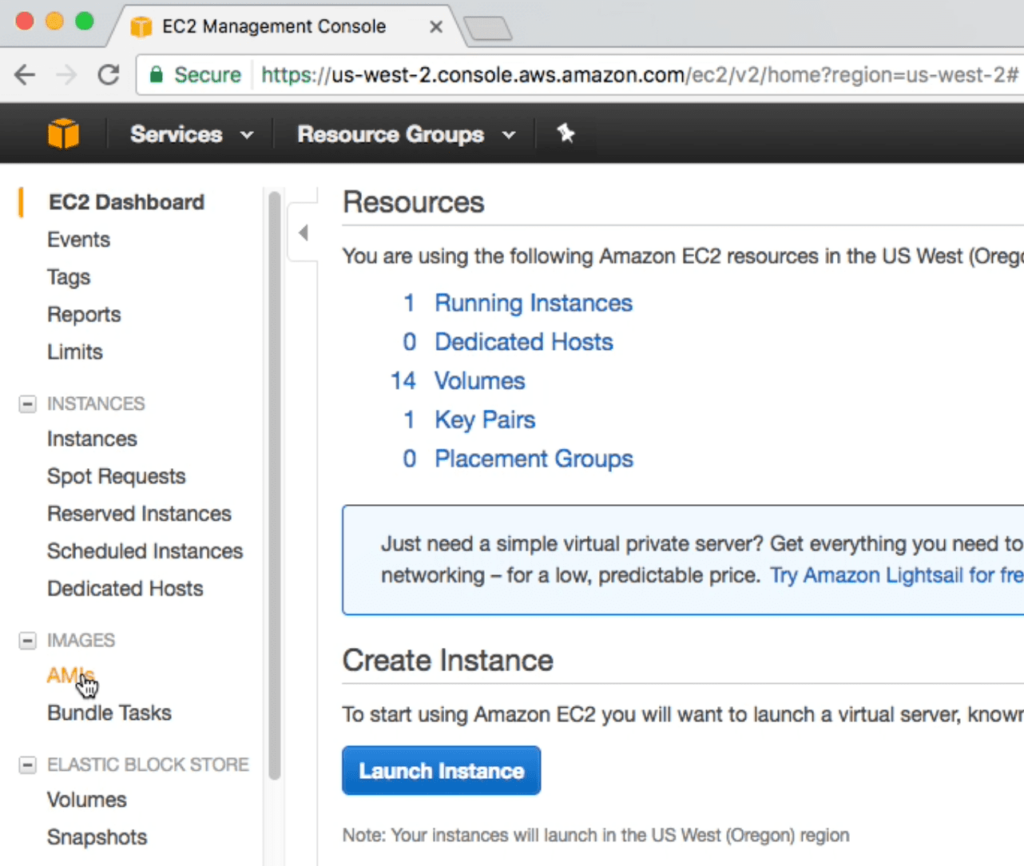
1. Go to the EC2 Dashboard and select AMIs.
2.Select the region you submitted in the AMI request form [Region Select].
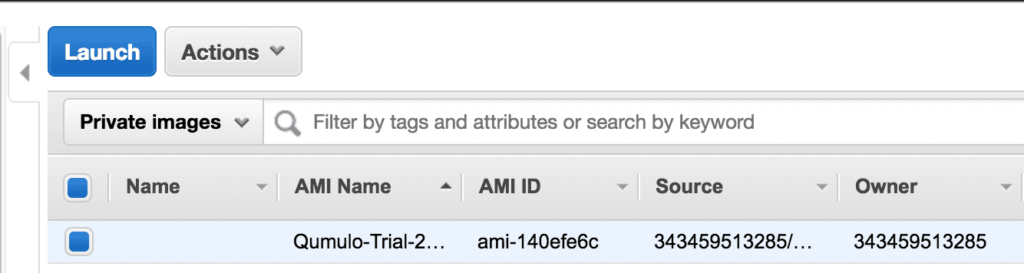
3. Select the Private images AMI source.
3. The Resource Group screen appears. Select the AMI image, named Qumulo-Trial….
5. Click Launch to begin provisioning the image. The Choose an Instance Typesceen appears.
6. Choose an m4.2xlarge instance type, then scroll down and click Review and Launch.
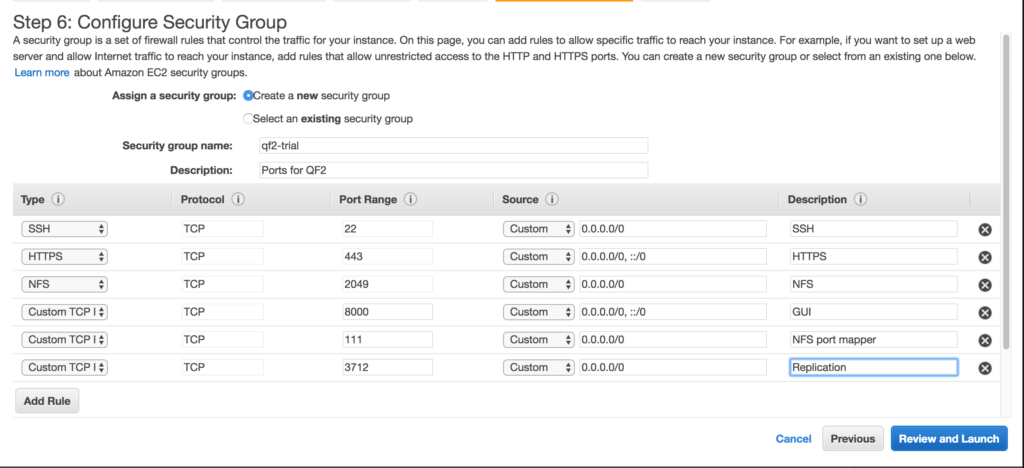
1. Click Edit security groups.
2. Configure or select the security group. If you have an existing configuration that keeps the following ports open, you can use that. If not, create a new security group. Here are the ports that should be open:
3. Here is an example screenshot.
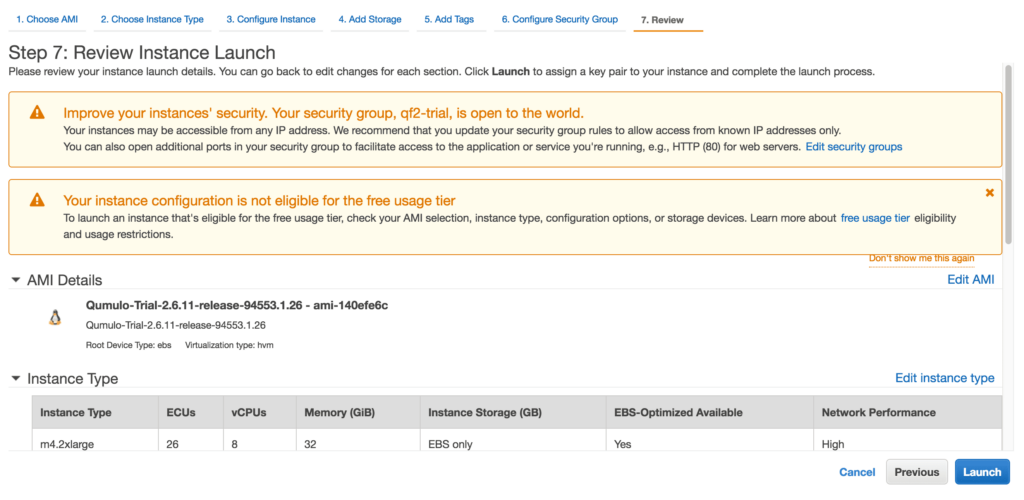
4. Click Review and Launch.
5. The Review Instance Launch Page appears. Review the settings and, if you are satisfied, click Launch.
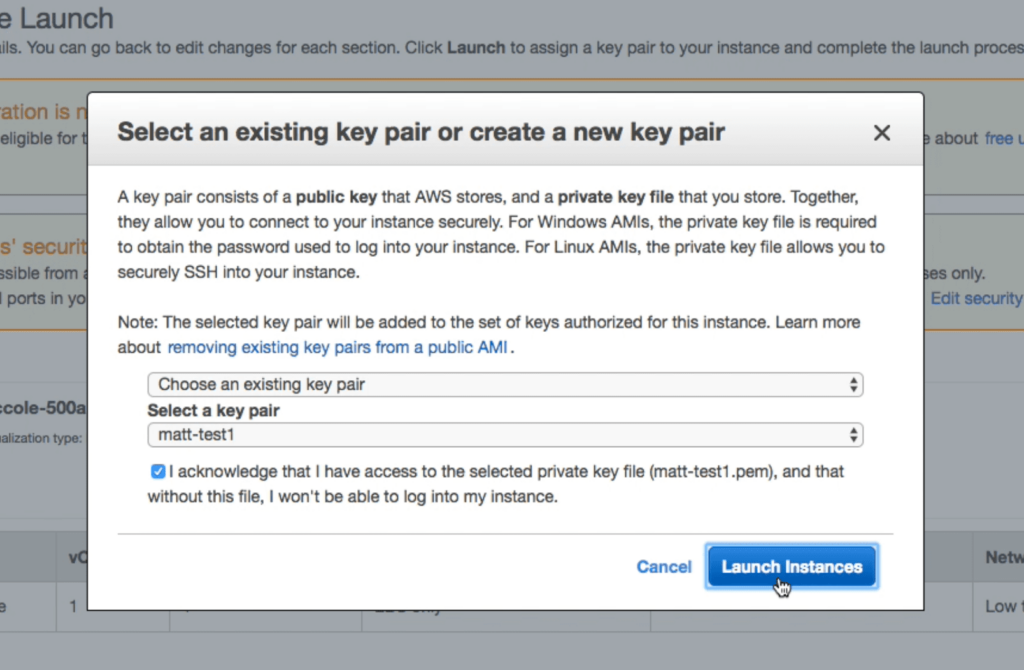
1. Select an existing key pair or create a new pair of keys. You need these keys to SSH into the instance. Click Launch instance.
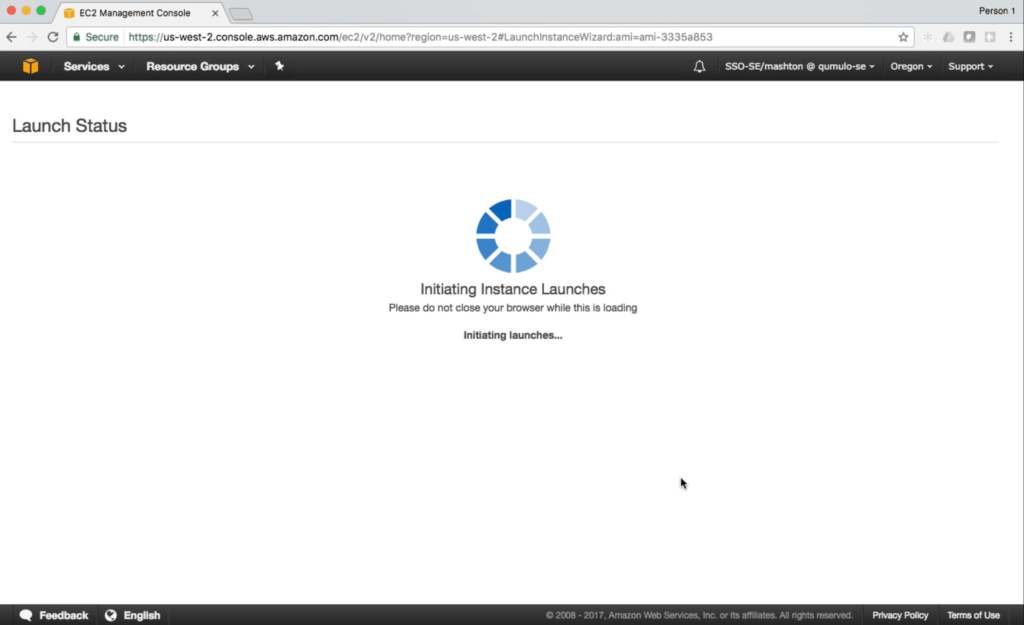
2. The instance begins to launch.
3. In a few moments, you will see the Launch Status screen.
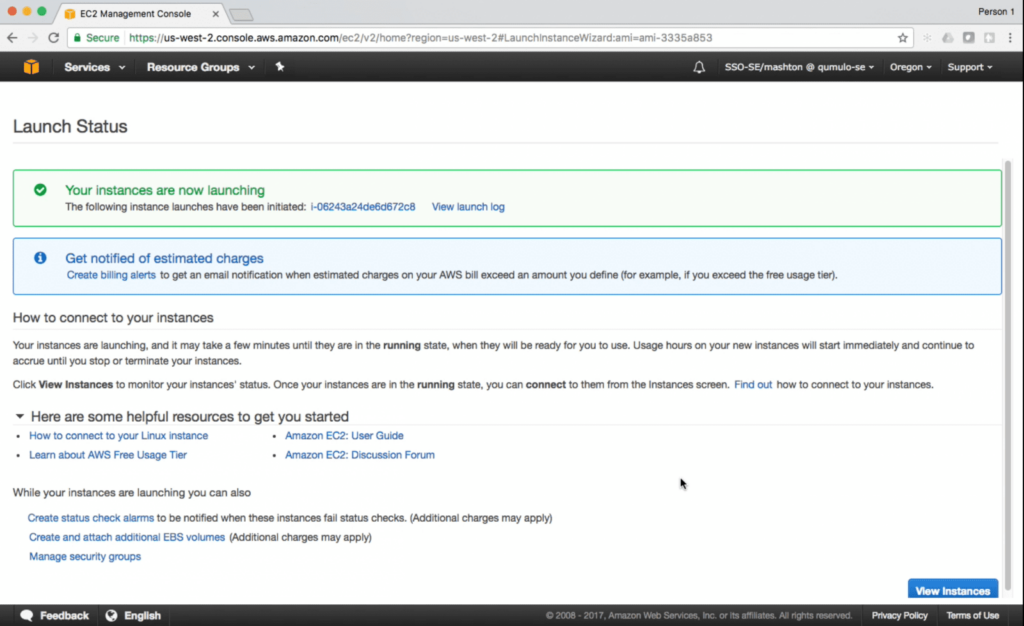
4. Click View Instances. A status screen appears.
Initialization times vary and can take as long as 10 minutes. You may need to refresh your browser to get status updates.
5. Keep checking the status screen until the Status Checks column shows 2/2 checks…
Once it does, Use your browser to access the instance. To see the IP address, select the instance and scroll down.
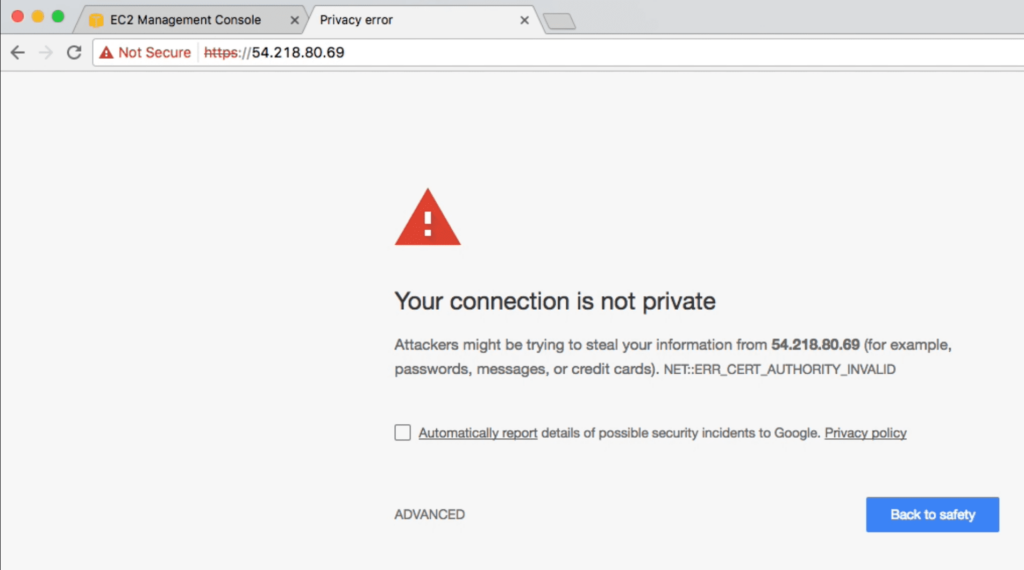
1. Enter the IP address or DNS name in the browser. You will see a Chrome privacy error.
2. Click ADVANCED. Click Proceed to *web site*.
3. The Qumulo EULA appears. Scroll to the bottom, select both boxes, then click Submit.
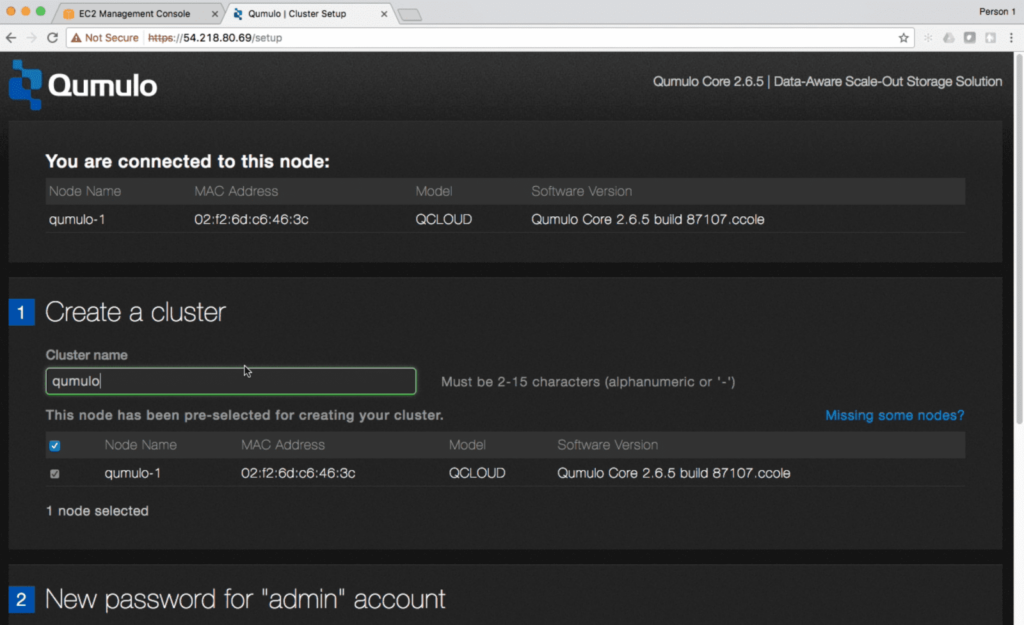
4. Name the cluster.
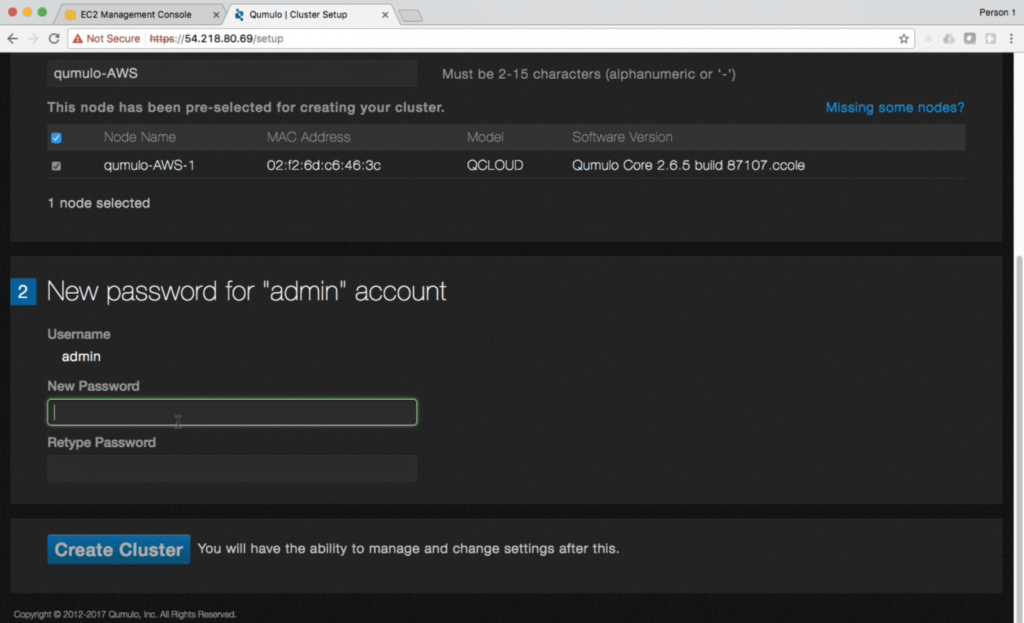
5. Scroll down and set the password for the admin account.
6. Click Create Cluster.
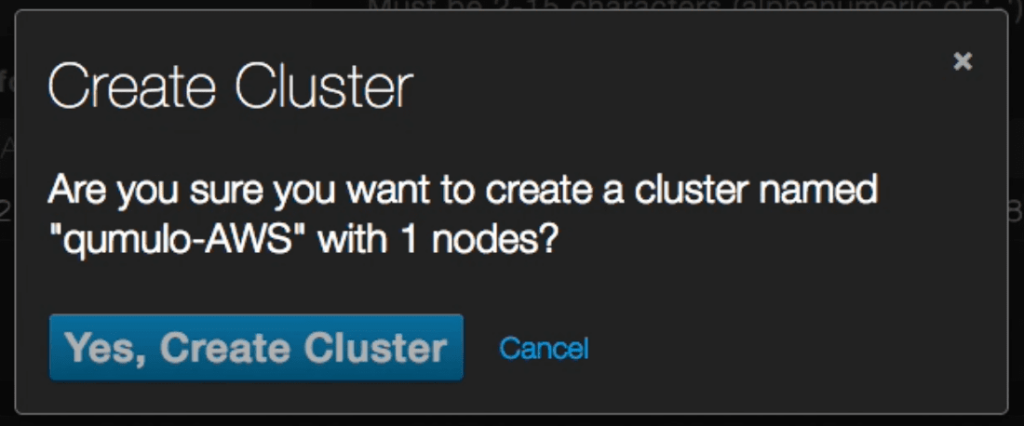
7. A dialog box appears and asks for verification. Click Yes, Create Cluster.
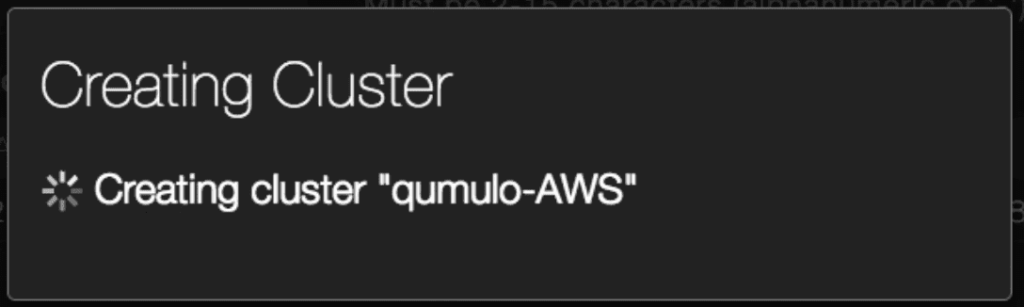
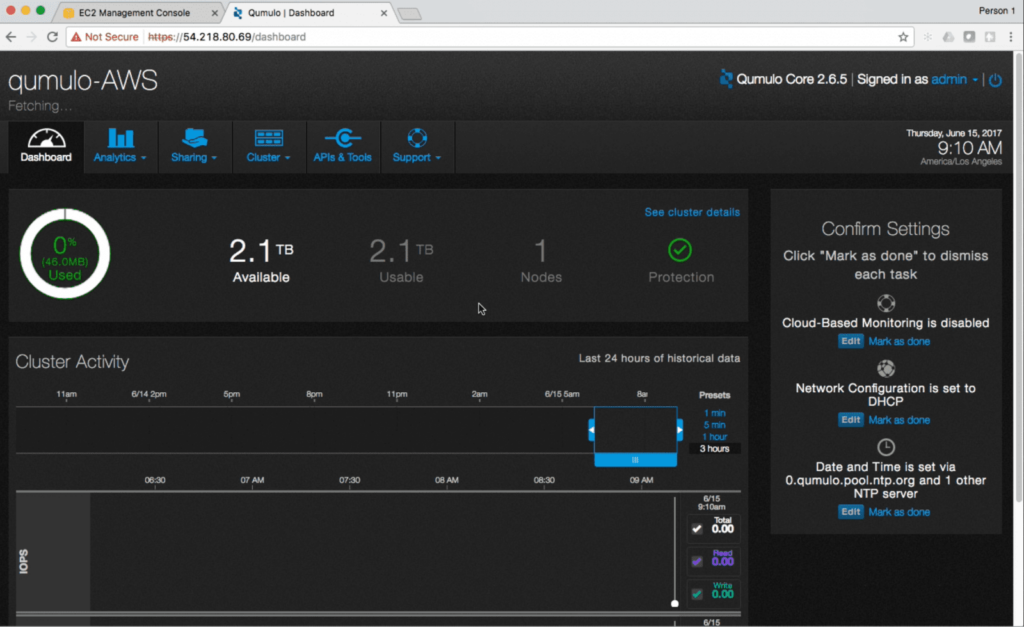
8. The status messaage appears.
8. Once the cluster is created, the GUI appears.
10. The cluster is ready to serve data.
Now that your cluster is ready to start sharing data, you can set up exports or shares. Here are the tutorials.